What's on this page
- What grooming a dog at home actually replaces
- Before you start
- Step 1: Match the tools to the coat you have
- Step 2: Pick a clipper and the right blade or guard length
- Step 3: Set up a safe grooming station
- Step 4: Brush and de-mat before any water touches the coat
- Step 5: Bathe and rinse until the water runs clear
- Step 6: Dry the coat all the way down to the skin
- Step 7: Clip the body in a set order
- Step 8: Tidy the face, feet, and sanitary areas
- Step 9: Trim the nails a little at a time
- Step 10: Check the ears and leave the cleaning gentle
- Step 11: Finish, inspect, and log the session
- A worked example: one medium dog, one home session, one year of savings
- Coat types and what each one needs
- Building the kit without overbuying
- How often to groom at home
- Common mistakes when grooming a dog at home
- Troubleshooting: mats, wiggly dogs, clipper marks, and a nicked quick
- When to book a professional groomer instead
- What at-home grooming does not save
- Your at-home grooming checklist
- The bottom line
Dog grooming is one of the few large pet costs you can genuinely take over yourself. The bill is not high because the work is mysterious. It is high because it takes a trained person about ninety minutes, on a table, with equipment you do not own yet. Buy some of that equipment once, learn the order of operations, and a recurring line in your budget turns into an afternoon at home with a brush, a bath and a set of clippers.
That last part is what this field guide is for. By the end you will know which tools your dog’s coat actually needs, how to pick a blade or guard length without ruining a coat, the exact order that keeps a home groom from going wrong, how to handle nails and ears without hurting anyone, and what one session at home is worth in dollars against a salon visit. If you want the salon side of that comparison, our dog grooming cost breakdown prices the services and our groomer tipping explainer covers the part of the bill most owners forget. Run your own numbers in the companion below as you read.
Key takeaways
- The outcome: one full home session, done in the order brush, bathe, dry, clip, with nails and ears handled calmly and a coat that looks even rather than tracked.
- The order is the skill. Clipping a matted, dirty or damp coat is the single fastest way to dull a blade, drag the skin and produce a home-groom finish everyone can spot.
- The money: one illustrative salon full groom plus tip runs about 78 dollars, home consumables about 4 dollars, so each session you take on keeps roughly 74 dollars.
- The kit pays for itself fast. An illustrative 180 dollar starter kit is covered partway through the third session and leaves about 412 dollars in the first year.
- Know the stop line. Tight mats, a stressed dog, a double coat someone told you to shave, or anything red, swollen or smelly goes to a professional groomer or your vet, not to your clippers.
What grooming a dog at home actually replaces
Before any technique, get the frame right, because it decides how much of the job you should take on. A salon full groom is a bundle, not a single service. Inside that one price sit a brush-out, a bath with two shampoos and a rinse, a full dry, a body clip, a face and feet tidy, a sanitary trim, nails, ears, and the handling time to keep a dog comfortable through all of it. When you groom at home you are not replacing a haircut. You are replacing that entire bundle, which is why the saving per session is larger than most owners expect and why the work takes longer than they expect too.
That framing also tells you where to start. You do not have to take the whole bundle on day one. Plenty of owners run a hybrid: brush, bathe and do nails at home every few weeks, and book the salon two or three times a year for the full clip. Each piece you take over is worth real money on its own, because salons price a nail trim, a bath and brush, and a full groom separately. Our grooming cost breakdown shows those service prices side by side, and the chart below puts one home session against them.
What one home session replaces (illustrative)
Representative prices for a medium dog, against the consumables one session at home actually uses. Bars are scaled to the most expensive option. Illustrative planning figures, not quotes.
Bars scaled to the 95 dollar mobile groom. The gap between the 78 dollar tipped salon visit and the 4 dollar home session is the roughly 74 dollars a home groom keeps, before you account for the equipment. Figures are illustrative and vary by region, salon, coat and dog size.
Before you start
A home groom goes well or badly in the first ten minutes, and almost all of that is preparation. Have these ready before the dog is anywhere near the table:
- An honest read on your dog's coat. Curly, wavy, silky, short and smooth, wiry and double are not the same job, and two of them should not be clipped short at all. Section three of this field guide sorts them out, and getting this wrong is the mistake that cannot be brushed out afterwards.
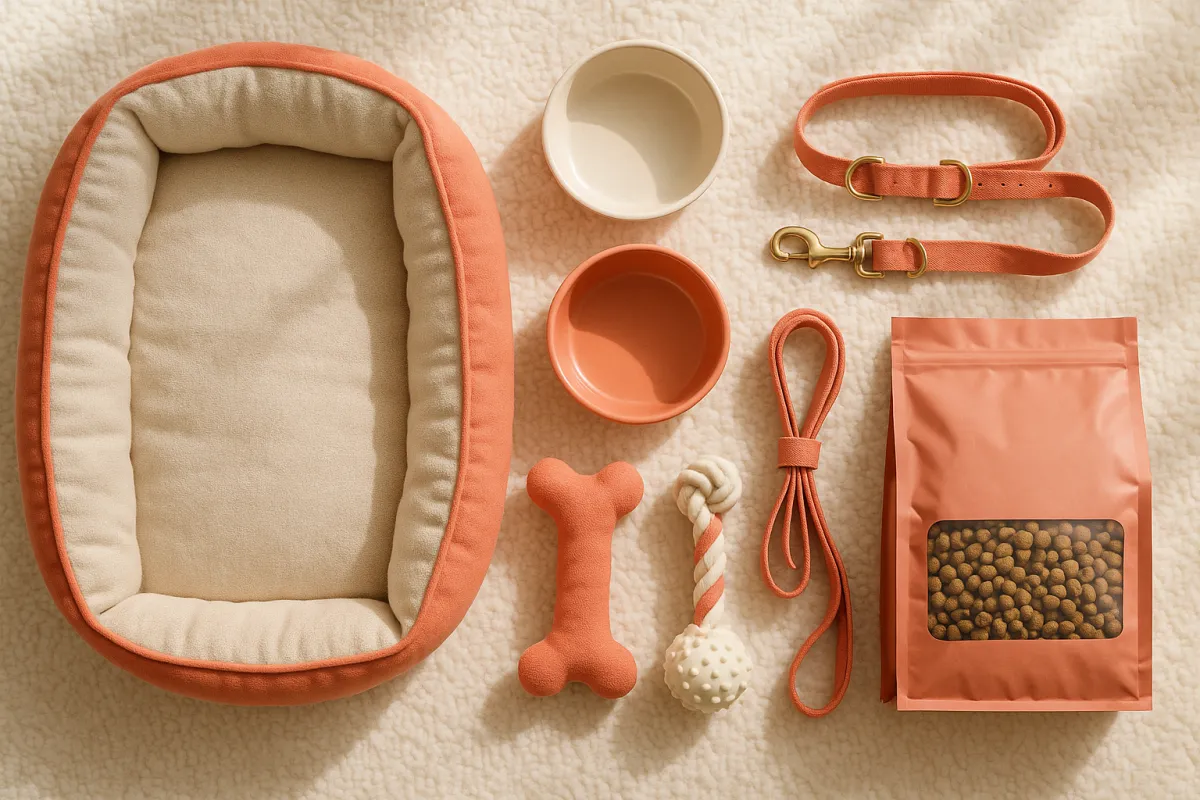
- The tools, laid out and reachable. Clipper and guard combs, slicker brush, metal comb, blunt-nosed scissors, nail clippers or grinder, styptic powder, shampoo, towels, and a non-slip surface. Nothing should require you to leave a dog standing alone while you look for it.
- A dog that has been walked and emptied. A dog with energy to burn will not stand still, and a dog that needs the garden will tell you halfway through the bath. Twenty minutes of exercise first buys you the calm you need later.
- Two hours you are not in a hurry for. A first home groom on a coated dog takes longer than a salon takes, because you are learning. Rushing is how clipper marks and nicked quicks happen.
- A clear stop rule, agreed with yourself in advance. If the dog is genuinely distressed, if you find a mat you cannot slide a comb under, or if anything looks red, swollen or sore, you stop and book out. That is a good outcome, not a failure.
Time and difficulty: budget about ninety minutes to two hours for a full session on a coated dog, and twenty minutes for a short-coat maintenance session. The work is not hard, but it is fussy, and the mistakes are all in the corners: the mat behind the ear, the damp patch under the armpit, the nail you took one sliver too far. Go slowly and the session mostly runs itself.
Step 1: Match the tools to the coat you have
Everything downstream depends on this, so do it before you buy anything. Run your hand and then a metal comb through the coat in a few places and work out which of five broad types you are dealing with. A short smooth coat lies flat, sheds steadily and needs almost no cutting. A double coat has a coarse outer layer over a dense woolly undercoat, sheds in seasonal blowouts, and is the coat you should not clip short. A curly or wavy coat keeps growing rather than shedding out, which is why it mats and why it needs regular clipping. A silky coat is long, fine and prone to tangles at the friction points. A wiry coat traditionally gets stripped rather than clipped, and clipping it softens the texture over time.
The coat type sets the kit, not the other way round. A short smooth coat needs a rubber curry or a bristle brush, a decent shampoo and nail clippers, and that is close to the whole list. A double coat needs an undercoat rake and a slicker plus real drying capacity, and it needs restraint with the clippers. A curly or wavy coat is the one that genuinely justifies a clipper and guard combs, because that coat will otherwise mat and end up shaved off by someone else. A silky coat needs a fine slicker, a comb and patience. If you own one of the coated breeds our cost pages cover, such as a Goldendoodle or a Poodle, you are in the highest-value case for learning this at home, because those coats bring the most salon visits per year.
The other half of matching tools to the coat is knowing what your dog will tolerate. Some dogs hate the sound of clippers and are fine with scissors. Some tolerate a bath and lose patience at the dryer. Buy for the coat, then adapt for the dog, and expect to spend the first few sessions finding out which tool your particular dog objects to least.
Step 2: Pick a clipper and the right blade or guard length
Two things confuse new home groomers, and both are worth getting straight before a clipper touches a coat. The first is that blade numbering runs backwards: a higher number cuts shorter. A number 10 blade takes the coat down to a very short length and is generally used for sanitary areas or by a groomer removing a mat, while lower-numbered blades leave more. Snap-on guard combs sit over a blade and add length back, which is how most home groomers should work, because a guard comb makes a too-short mistake much harder to commit.
The second is that the safe direction is always from long to short. Start with the longest guard comb you own, take a full pass, look at the result, and only step down a length if the coat is still uneven or you wanted it shorter. You can always take more off. You cannot put any back, and a dog clipped too short can be genuinely uncomfortable in sun or cold until the coat grows out. This field guide names no clipper models and no blade brands on purpose. What matters is that the clipper is rated for the coat you have, that the blade is sharp, and that you keep it cool and oiled, because a hot or blunt blade is the usual cause of both a bad finish and a dog that will not stand for the next session.
Blade heat deserves its own habit. Blades warm up quickly against a coat, and the back of your wrist is a decent thermometer. Touch the blade to your wrist every few minutes, and if it is uncomfortable for you, it is uncomfortable for the dog. Stop, oil it, let it cool, or swap to a second blade while the first one rests. This one habit prevents most clipper burn, and clipper burn is the thing that turns a dog off home grooming permanently.
Step 3: Set up a safe grooming station
You do not need a professional table, but you do need to stop the dog moving under you, because a dog that slides is a dog you will nick. Any raised, stable surface with a non-slip mat works: a sturdy table, a washer top with a bath mat, a picnic bench in the garden for a heavy-shedding dog. Raising the dog changes two things at once. It saves your back, and it puts most dogs into a calmer, more compliant mode than they manage on the floor where they can simply walk away.
Set the space up so nothing interrupts you. Tools within arm’s reach, towels stacked, the bin for hair open, the door shut, the floor clear of anything you can trip on. If you use any restraint, use it only under direct supervision and never leave a dog alone on a raised surface for even a moment, because a dog stepping off a table while tethered is one of the few ways a home groom can cause a serious injury. If you have a second person available for a first session, take them, because a hand on the collar and a voice at the dog’s head is worth more than any accessory you can buy.
Lighting matters more than people think. You cannot see an uneven line, a small mat or the chalky ring on a cut nail in a dim room. Work in daylight if you can, or set up a bright lamp. Groomers work under good light for a reason, and it costs you nothing to copy.
Step 4: Brush and de-mat before any water touches the coat
This is the rule the whole session hangs on: brush out completely, dry, before the bath. Water tightens tangles. A loose tangle that would have combed out in ten seconds becomes, after a bath and a dry, a felted mat sitting hard against the skin that can only be cut out. Every groomer knows this, and it is the single biggest reason home grooms go wrong.
Work in sections, in the direction the coat grows, and use line brushing on a coated dog: lift a layer of hair with one hand, brush the layer below it out from the skin, then let the next layer down and repeat. It is slower than sweeping a slicker over the top of the coat, and it is the only method that actually reaches the base of the hair where mats form. Then check your own work with a metal comb. If the comb passes from skin to tip anywhere you put it, the coat is ready. If it snags, the brush did not finish the job, whatever the surface looked like.
Pay attention to the friction points, because that is where mats live: behind and under the ears, in the armpits, on the inner thighs, around the collar line, under a harness, and around the tail. On a mat that is loose enough to lift, work it apart with your fingers and the ends of a comb, from the outside in, holding the hair at the base so you are not pulling on skin. On a mat that is tight against the skin, stop. Skin lifts into the base of a tight mat, and clipping blind through one is how owners cut dogs. That is a job for a groomer with the right blade and a clear view.
Step 5: Bathe and rinse until the water runs clear
Once the coat combs through cleanly, bathe. Use lukewarm water, closer to tepid than warm, and a shampoo formulated for dogs. Human shampoo is the wrong pH for canine skin and dries it out, which shows up later as flaking and scratching. Wet the coat properly first, because a dense or curly coat repels water for the first minute and a shampoo applied to a coat that is only damp on top never reaches the skin at all.
Work the shampoo down to the skin with your fingertips, not your nails, and go in the same order every time so you never miss a section: neck, shoulders, back, sides, chest, legs, feet, tail, and the head last and carefully. Keep water and shampoo out of the eyes and out of the ear canals. A washcloth rather than a spray is the sensible tool for the face on most dogs. If the coat is genuinely dirty, two short shampoos work better than one long one, which is exactly what a salon does.
Then rinse for longer than you think you need to, and keep rinsing until the water running off is completely clear and the coat squeaks slightly rather than feeling slick. Shampoo left in the coat is the hidden cause of a lot of post-bath itching and dull, sticky-looking hair. Conditioner is optional and genuinely useful on long silky and curly coats, where it reduces tangling before the next session. If your dog is on a topical parasite product, check the timing rules on that product before bathing, since bathing too soon can affect how it works. Our flea and tick prevention comparison covers how those products differ.
Step 6: Dry the coat all the way down to the skin
Drying is where home grooms most often fall short, and it is why a home haircut can look fluffy on top and ragged underneath. A coat that is dry on the surface and damp at the base cannot be clipped evenly, because damp hair lies flat, slips through the blade and springs up afterwards into visible tracks. Worse, a thick coat left damp at the skin stays damp for hours and can leave the skin irritated.
Towel first, and press rather than rub, because rubbing a coated dog is how you create tangles you just spent half an hour removing. Then dry with air. A forced-air dryer made for dogs is the one genuine equipment upgrade for thick or curly coats, and it does two jobs at once: it blows water out of the coat and it separates the hair as it goes, which is exactly what you need before clipping. A human hairdryer on its coolest setting can work on a small dog if you keep it moving and never let it sit in one place, but heat is the risk and dogs cannot tell you when a spot is too hot.
Brush while you dry rather than after. Air plus a slicker, working section by section, is what produces the straight, lifted coat that a clipper can cut evenly. When you think you are done, check the places that stay wet longest: under the armpits, the chest, the base of the tail, the backs of the thighs and behind the ears. If any of those are still damp, the dog is not ready for step seven.
Step 7: Clip the body in a set order
Now, on a clean, dry, fully brushed coat, clip. Start with the longest guard comb you own. Work with the direction the coat grows, not against it, because clipping against the grain cuts much shorter than most owners intend and shows every unevenness. Use long, smooth, overlapping strokes at a steady speed. Let the clipper do the cutting rather than pressing it into the dog, and keep your free hand ahead of the blade, holding the skin flat and smooth.
Use a fixed route so you never lose track of what you have done. Neck and shoulders, along the back, down each side, the chest, then the legs, then the underside, then the tail. Repeating the same route each session builds muscle memory and makes the finish more consistent every time. Move the loose skin taut with your free hand at the elbows, armpits, and flanks, because loose skin folding into a blade is exactly how a nick happens. Go slowly around bony points, the hocks, the elbows, and anywhere the skin is thin.
Two cautions carry more weight than the rest. First, do not shave a double-coated dog short. That coat insulates against heat as well as cold, and shaving it can change how it regrows and how the dog copes in the sun. If you have been told a shave will stop the shedding, talk to a professional groomer first. Second, keep checking blade heat against your wrist. Comb the coat back up between passes, look at it in good light, and take a second pass only where the finish is genuinely uneven. Most home-groom disasters come from chasing perfection with a hot blade on a tired dog.
Step 8: Tidy the face, feet, and sanitary areas
These are the fiddly parts, and they are also the parts most visible to everyone who meets your dog. Use blunt-nosed safety scissors here, never pointed shears, and never work with the points aimed at the dog. Face first: trim the hair that falls into the eyes by lifting it away from the face and cutting with the scissors held parallel to the muzzle rather than pointing at it. Take tiny amounts. A face is the one place where a small error is obvious for six weeks.
Feet next. Long hair between the pads makes dogs slip on hard floors and traps grit, so trim it flush with the pad rather than digging between the toes. Round the hair around the outside of the foot by combing it up and trimming the fringe that stands proud of the paw. Do not use clippers between the toes unless someone has shown you how, because the webbing there is thin and moves.
Sanitary areas are last and stay conservative: a short, tidy strip around the rear and, on a coated dog, a little under the belly, so waste does not catch in the coat. This is hygiene, not styling. If you notice anything unexpected while you are there, redness, swelling, a lump, or an area the dog reacts to, that is a call to your vet rather than something to trim around. Our vet visit cost page sets expectations for what that appointment involves.
Step 9: Trim the nails a little at a time
Nails are the step most owners dread, and the fear is reasonable, because inside each nail sits the quick, the living core that carries the nail’s blood supply and feeling. Cut into it and the nail bleeds and it hurts. The good news is that the method that avoids it is simple and slow: take small slivers off the tip rather than one confident cut.
On pale nails you can usually see the quick as a pink core inside the nail, and the job is to stay comfortably clear of it. On dark nails you cannot see anything, so you read the cut surface instead. Take a thin sliver, look at the end of the nail, and repeat. As you get closer to the quick, the cut surface changes from chalky and uniform to a lighter ring with a small dark dot appearing at the centre. That dot is your stop sign. Cut once more and you are into the quick.
Keep styptic powder open and within reach before you start the first nail, not after you need it. If you do catch a quick, stay calm, apply the powder with gentle pressure, and stop the session there rather than pushing on with a dog that now associates the table with pain. Two other honest limits are worth stating. Nails left long for months have a quick that has grown out with them, so they cannot be shortened to a normal length in one session and instead need small trims every week or two so the quick recedes. And if a nail looks split, swollen at the base, discoloured or painful, that is a veterinary matter, not a trimming one. A grinder is a gentler alternative to clippers for many dogs, especially those that flinch at the pressure of a clipper, though the noise and vibration take their own introduction.
Step 10: Check the ears and leave the cleaning gentle
At home, this step is mostly looking. Lift the ear flap and check what you can see: a healthy ear looks pale and clean and does not smell. Redness, brown or yellow discharge, a strong odour, swelling, or a dog that shakes its head, tilts it, or scratches at the ear are all signs that belong with your vet. Those are medical findings, and no amount of cleaning at home fixes them. Trying to clean an ear that has an underlying problem can make things worse.
If the ear looks and smells normal, a gentle wipe of the outer ear and the visible folds with a product your own vet has approved is all a healthy ear generally needs. The hard rules are short and worth keeping: nothing goes down into the canal, cotton swabs stay out because they push debris deeper, and you never pour a cleaning solution into an ear that has not been examined, since a damaged eardrum turns a routine product into a real risk. Some coated breeds grow hair inside the ear opening, and whether that hair should be removed is a genuinely contested question. Ask your own vet or a professional groomer about your specific dog rather than acting on a general rule.
Ears are also the clearest example of the line this field guide keeps drawing. Grooming is cosmetic and hygienic work. The moment something looks or smells wrong, it stops being a grooming task. Chronic ear problems in particular are often driven by allergies or other underlying conditions, and our allergy treatment cost page explains what that pathway looks like when it turns into a diagnosis rather than a wipe.
Step 11: Finish, inspect, and log the session
Finish with a full brush-out, because clipping leaves cut hair sitting in the coat that will otherwise end up on your sofa. Comb through everything one more time in good light and look for anything you missed: an uneven line along the flank, a fringe on one foot longer than the other, a damp patch under an armpit, a tuft behind an ear. Small corrections now cost seconds. Discovering them tomorrow means getting the dog back on the table.
Then run a proper head-to-tail check while your hands are already on the dog. Nobody gets a better look at a dog’s skin than the person who just bathed and clipped it. Feel for lumps, scabs, hot patches, ticks, and sore spots, and look at the eyes, the gums, and between the toes. This is quietly one of the largest benefits of home grooming and it does not show up in the price comparison at all: you find things early. A lump you notice in month one is a different conversation from a lump you notice in month six, and our lower your vet bills page makes the same argument about catching problems before they escalate. While you are checking the mouth, note that home grooming does not replace dental care, which our dog teeth cleaning cost page covers separately.
Last, write down what you did: the date, the guard length you used on the body, what you used on the face and feet, how long the session took, and how the dog handled it. Three sessions in, that log is the difference between guessing and repeating a result you liked. Then pay the dog properly. A treat, a walk, a game. The next session is easier if this one ended well.
A worked example: one medium dog, one home session, one year of savings
Make it concrete with one illustrative case. Nala is a medium-sized dog with a wavy coat that keeps growing, so she has been going to a salon roughly every six or seven weeks. Her full groom is priced at 65 dollars, and her owner tips 20 percent, which is 13 dollars, so each visit really costs 78 dollars. At eight visits a year, the coat is costing about 624 dollars annually.
Her owner buys a starter kit for an illustrative 180 dollars: a clipper with guard combs, a slicker brush, a metal comb, blunt-nosed scissors, nail clippers, styptic powder, shampoo and a non-slip mat. Each home session then uses roughly 4 dollars of consumables, counting shampoo, blade oil, a wipe or two and the towel laundry. That makes the arithmetic simple. Each session at home replaces 78 dollars of salon spend at a cost of 4 dollars, so it keeps 74 dollars. The 180 dollar kit is covered by the first two sessions plus a little of the third, which is to say partway through session three she is grooming for free.
Across the full year, eight home sessions keep 8 times 74, which is 592 dollars, before equipment. Subtract the 180 dollar kit and the first year nets about 412 dollars. From the second year on, with the kit already bought, the same schedule keeps the full 592 dollars, because only the 32 dollars of annual consumables comes off the 624 dollars of salon spend she is no longer paying. Set against the running cost of a dog, that is a meaningful line: our monthly dog cost breakdown shows where it sits among the others, and the lifetime cost page shows what it compounds to over a dog’s life. Put your own salon price, session count and kit cost into the companion below to see your version of these figures.

Where the first-year grooming dollar goes
Nala's illustrative 624 dollars of annual salon spend, split by what the first year of home grooming does with it. The three segments are the one-off kit, the consumables, and what stays in the budget.
The three segments sum to 100 percent of the 624 dollars Nala's owner would otherwise have spent at the salon. In year two the kit segment disappears and about 592 dollars stays put. Figures are illustrative and vary by region, salon and coat.
Coat types and what each one needs
Worth expanding, because the coat decides how much of this you can do and how often. A short smooth coat is the easiest case and the least valuable one financially, since these dogs rarely visit a salon anyway. A rubber curry brush once or twice a week lifts loose hair, a bath every couple of months keeps the coat clean, and nails and ears are the only recurring tasks. There is nothing here that needs clippers.
A double coat is the case where restraint saves you the most trouble. The undercoat is what sheds, and the answer is de-shedding with a rake and a slicker plus a thorough bath and blow-out at the seasonal shed, not a clip. These dogs cost real money at salons during blowout season, so the equipment pays off, but the temptation to shave is the thing to resist.
Curly and wavy coats are the highest-value case for a home clipper, because that hair grows continuously and mats if it is not maintained, which is what puts these dogs on a six to eight week salon schedule. They need brushing several times a week between sessions, and the brushing matters more than the clipping. A silky coat sits close behind: long, fine hair that tangles at the friction points and needs a fine slicker, a comb and regular tidying rather than a full clip. Wiry coats are the exception to nearly everything above, because their texture traditionally comes from hand stripping, and clipping softens it over time. If your dog has a wiry coat and you care about the texture, that is a conversation with a groomer who strips.
Building the kit without overbuying
The most common money mistake in home grooming is not buying a bad clipper. It is buying a large box of tools for a coat your dog does not have. Build the kit in three layers instead. Layer one is what every dog needs regardless of coat: a brush suited to the coat, a metal comb, nail clippers or a grinder, styptic powder, a dog shampoo, towels and a non-slip mat. That layer is inexpensive and immediately useful even if you never clip at all.
Layer two is the clipper and guard combs, which only earn their place if your dog has a coat that needs cutting. This is the bulk of the illustrative 180 dollar kit, and it is worth buying once at a sensible quality rather than twice at the cheapest, because underpowered clippers stall in thick coats, pull hair, and teach a dog to hate the process. Blunt-nosed safety scissors belong here too.
Layer three is the upgrade you buy later if the first year goes well: a forced-air dryer, a second blade so one can cool while the other works, or a proper grooming table. Drying is genuinely where home results lag salon results, so the dryer is usually the highest-value item in this layer. Buy it in year two, out of the money you already saved, rather than in week one out of enthusiasm. If you are still assembling a first-time setup for a new dog, our new puppy budget plan shows where grooming gear fits among the other startup costs.
How often to groom at home
Different parts of the job run on different clocks, and separating them stops the whole thing feeling like a chore. Brushing is the frequent one: several times a week for curly, wavy, silky and double coats, weekly for short smooth coats. Brushing is also the task with the best return, because a coat that never mats never needs an emergency shave.
Bathing runs on need rather than schedule. Most dogs do fine every four to eight weeks, and more often than the coat requires strips natural oils and can leave skin dry and itchy. A dirty dog is a reason to bathe. The calendar on its own is not.
Clipping follows the coat’s growth. Six to eight weeks is the usual range for a coated dog, which is where the illustrative eight sessions a year comes from. Nails are on a three to four week clock for most dogs, though a dog that walks on pavement daily wears them down and needs less. Ears get a look every time the dog is on the table. As dogs age, the whole routine tends to get gentler and shorter rather than less frequent, since standing for ninety minutes is harder on old joints. Our senior dog care page covers what else shifts in those years.
Common mistakes when grooming a dog at home
The failures are predictable, which is good news, because it means they are avoidable. Bathing before brushing is first on the list and causes more damage than everything else combined, since water turns a workable tangle into a mat that has to be cut out. Clipping a damp coat is second, and it produces the tracked, uneven finish that people recognise as a home haircut.
Going too short on the first pass is third. Owners who start with a short guard because they want the groom to last longer end up with a dog that is uncomfortable and a result they cannot fix for weeks. Start long. Related to it is clipping against the direction of hair growth, which cuts far shorter than intended and shows every mistake.
The rest cluster around haste and equipment. Letting a blade get hot and carrying on anyway causes clipper burn. Cutting nails with one confident snip instead of several small slivers is how quicks get caught. Skipping the comb check after brushing means clipping over mats you never found. Using human shampoo dries the skin. Digging into ear canals with cotton swabs pushes debris deeper. And doing the whole session in one long sitting with a dog that stopped enjoying it forty minutes ago teaches the dog that the table is unpleasant, which costs you every future session. Two shorter sessions on consecutive days beat one grim marathon.
Troubleshooting: mats, wiggly dogs, clipper marks, and a nicked quick
For a mat you can lift away from the skin, hold the hair at its base so the pull is on your fingers rather than the dog, and pick it apart from the outer edge inward with your fingers and the tip of a comb. Work in small amounts and stop if the dog reacts. For a mat that lies flat and tight against the skin, do not cut into it and do not run clippers under it blind, because the skin lifts up into a tight mat and you can cut the dog badly without seeing it happen. That one goes to a professional groomer.
For a dog that will not stand still, shorten the session rather than fighting it. Break the groom into pieces across a few days, pair each tool with treats before you use it, and let the dog investigate the clipper while it is running but not touching. Some dogs need weeks of that introduction, and the weeks are worth it.
For clipper marks and uneven patches, resist the urge to keep cutting. Comb the coat up, look in good light, and take one careful corrective pass with the same guard length in the direction of growth. If the unevenness is significant, the honest fix is to leave it and let it grow, or to book a groomer to tidy it, rather than to chase it shorter and shorter. For a nicked quick, apply styptic powder with gentle pressure and hold it. If bleeding does not stop after a few minutes of steady pressure, call your vet. For any cut to the skin, however small, clean the area and call your vet for advice rather than deciding yourself whether it needs attention. And for a dog that will not get back on the table after a bad session, go all the way back to the beginning: table, treats, no tools, several times, until the table is boring again.
When to book a professional groomer instead
Home grooming is a skill you build, not a vow you take, and the owners who do it best are the ones who know when to hand a session over. Book out for tight or widespread matting, because removing those safely takes a short blade, a steady hand and a clear view of the skin. Book out for any dog that snaps, panics, or cannot be handled safely, since a frightened dog near a blade is a genuine injury risk to both of you.
Book out for a double-coated dog someone has told you to shave, at least until a groomer has looked at the coat. Book out for a first groom on a puppy, where a calm, positive early experience is worth more than the money saved, and for a senior dog whose balance or joints make standing hard. Book out for anything that looks medical: inflamed skin, a swollen nail bed, a smelly ear, a lump you had not noticed before. Those are vet visits.
There is also a perfectly reasonable middle position. Many owners handle brushing, bathing and nails at home and book the full clip three or four times a year instead of eight. That still removes half the annual grooming spend while keeping a professional eye on the coat and the dog. When you do book, our tipping explainer covers the part of the bill that is easy to underestimate, and remember that a groomer who sees your dog occasionally is also someone who will tell you honestly whether your home results are holding up.
What at-home grooming does not save
Be straight about the limits, because a saving that quietly reappears elsewhere is not a saving. Home grooming does not replace veterinary care of any kind. It does not treat skin conditions, ear infections, allergies or nail injuries, and a groom is not a diagnosis. It does not replace dental work either, since brushing teeth at home helps but does not do what a professional cleaning under anaesthesia does.
It also costs you time, and the time is real. Ninety minutes to two hours per session, eight times a year, is somewhere between twelve and sixteen hours annually. If those hours are genuinely worth more to you than the roughly 592 dollars a year in the worked example, the salon is the rational choice and there is nothing wrong with that answer. Home grooming pays best for owners who have the time and a coat that demands frequent attention.
Finally, the equipment is not free forever. Blades dull and need sharpening or replacing, clippers eventually fail, and shampoo runs out. None of that is large, but a home groomer who never budgets for replacement is comparing an unfair set of numbers. Build a small annual line for it and the comparison stays honest. For a fuller view of where grooming fits against food, prevention and vet care over a whole year, our first-year dog cost page puts the categories side by side.

Your at-home grooming checklist
Save this and work it top to bottom every session:
- Walk the dog and let it empty before anything starts.
- Lay out every tool within reach: brush, comb, scissors, clipper and guards, nail clippers, styptic powder, shampoo, towels, mat.
- Set up on a stable, non-slip, well-lit surface, and never leave the dog on it unattended.
- Brush the whole coat out dry, in sections, in layers from the skin outward.
- Check your brushing with a metal comb: it must pass skin to tip everywhere, especially behind the ears, armpits, inner thighs and tail.
- Stop and book a groomer for any mat that lies tight against the skin.
- Bathe with dog shampoo in lukewarm water, working to the skin, keeping water out of eyes and ear canals.
- Rinse until the water runs completely clear.
- Dry all the way to the skin, brushing as you dry, and check the armpits, chest, thighs and behind the ears.
- Clip with the longest guard first, with the grain, in the same route every time, skin held taut.
- Check blade heat against your wrist every few minutes and stop to oil or cool it.
- Tidy face, feet and sanitary areas with blunt-nosed scissors only, points never aimed at the dog.
- Trim nails in small slivers, stopping at the chalky ring with a dark centre, styptic powder already open.
- Look at the ears without entering the canal, and send anything red, swollen or smelly to your vet.
- Brush out, inspect in good light, and run a head-to-tail check for lumps, ticks and sore spots.
- Log the date, guard length, session time and how the dog handled it, then reward the dog.
The bottom line
Grooming a dog at home is a procedure, not a talent, and the procedure is the whole trick. Brush completely, bathe and rinse until the water is clear, dry all the way to the skin, then clip with the longest guard in the direction of growth. Nails come off in small slivers with styptic powder already open. Ears get looked at, not dug into. Anything that is matted tight, inflamed, swollen or frightening to the dog goes to a professional groomer or your vet, and choosing that is good judgement rather than defeat.
The money follows the same arithmetic every time. One illustrative salon visit at 78 dollars with the tip against about 4 dollars of consumables keeps roughly 74 dollars a session, which is about 592 dollars across eight sessions, or about 412 dollars in the first year once an illustrative 180 dollar kit is paid for. Start with the brushing and the nails, add the clipper when you are confident, and let the coat rather than the calendar set the pace. Compare against the salon prices in our grooming cost breakdown, see where the line sits in the monthly dog budget, and put your own salon price and session count into the companion below so the decision rests on your figures rather than an average.
A straight word from the MuttMark pack before you pick up the clippers: what you have just read is a general home-grooming walkthrough written to help you take a routine cosmetic job in-house, and none of it is veterinary advice or a substitute for a professional groomer who can see your actual dog. Every price, session count, kit total and saving above is an illustrative planning figure rather than a quote, and real costs move with your region, your salon, your dog’s size and the coat it happens to have. Nothing here should be used to assess, treat or rule out a health problem: skin, ears, nails, lumps, lameness and behaviour that changes around handling all belong with your own veterinarian, and mats, difficult coats and dogs that cannot be handled safely belong with a qualified groomer. Work slowly, stop when the dog tells you to stop, and let someone who has trained for it take the sessions that are beyond a home setup.
Frequently asked questions
How do I groom a dog at home?
Home grooming follows a fixed order, and the order matters more than the technique. Brush and work out every tangle first, then bathe with a dog shampoo and rinse until the water runs clear, then dry the coat all the way down to the skin, and only then clip. Clipping a dirty, damp or matted coat dulls blades, drags the skin and leaves tracks, which is why groomers never do it. After the body clip, tidy the face, feet and sanitary areas with blunt-nosed scissors, trim the nails a little at a time, look at the ears without digging into them, and finish with a brush-out and a quick head-to-tail check for lumps, ticks or sore spots. Every figure in this field guide is illustrative, and anything that looks medical belongs with your vet rather than with a pair of clippers.
How much money does grooming a dog at home actually save?
Take one illustrative medium dog on a salon schedule. A full groom runs about 65 dollars, and a 20 percent tip takes the real cost of the visit to roughly 78 dollars. Doing the same session at home consumes maybe 4 dollars of shampoo, blade oil and laundry, so each session you handle yourself keeps about 74 dollars. On a schedule of eight sessions a year, that is roughly 624 dollars of salon spend replaced and about 592 dollars kept before equipment. A starter kit at an illustrative 180 dollars leaves a first-year net of about 412 dollars, and the kit is paid off partway through the third session. These are planning numbers, not quotes, and our grooming cost breakdown covers the salon side of the comparison in detail.
What clipper blade or guard length should I use on my dog?
Blade numbering runs backwards from what most people expect: the higher the number, the shorter the cut. A number 10 blade leaves the coat very short and is normally reserved for sanitary areas and for a groomer clearing a mat, while lower-numbered blades and snap-on guard combs leave progressively more length. For a first home groom, the safe move is to start with the longest guard comb you own, take a pass over the body, and only step down a length if the finish is still uneven. You cannot put hair back on. Coat type matters more than the number: double-coated dogs generally should not be clipped short at all, and if you are unsure what your dog's coat can take, ask a professional groomer before the first pass rather than after it.
How often should I groom my dog at home?
The brushing schedule and the clipping schedule are different things. Curly and wavy coats that keep growing usually need brushing several times a week and a full clip every six to eight weeks, which is where the illustrative eight sessions a year in this field guide comes from. Short smooth coats rarely need clipping at all and do well on a weekly brush and an occasional bath. Double coats need frequent de-shedding and a bath at seasonal blowouts, not a clip. Nails are on their own clock, generally every three to four weeks, and ears get looked at whenever the dog is on the table. Bathing more often than the coat needs strips oils and creates its own problems, so let the coat, not the calendar, set the pace.
Is it safe to trim my dog's nails at home?
Trimming nails at home is a normal owner task, but it is the step that goes wrong most often, because inside each nail is the quick, the living core that carries blood supply and feeling. On pale nails the quick shows as a pink line you can stay well clear of. On dark nails you cannot see it, so the safe method is to take small slivers off the tip and stop as soon as the cut surface shows a chalky ring with a dark spot appearing at the centre, which means the quick is close. If you catch the quick it will bleed and it will hurt, which is why styptic powder belongs in the kit before the first trim. If your dog panics, has very dark or overgrown nails, or has any nail that looks split, swollen or infected, that is a job for your vet or a professional groomer rather than for you.
Should I clean my dog's ears when I groom at home?
Keep this step conservative. At home, looking is most of the job: lift the ear, check that the visible part is clean and pale rather than red, swollen or dark, and notice any smell. If everything looks normal, a gentle wipe of the outer ear with a product your vet approves is usually all a healthy ear needs. Never push a cotton swab down into the canal, and never pour anything into an ear you have not had checked, because pushing debris deeper or medicating an ear with a damaged eardrum can do real harm. Redness, discharge, odour, head-shaking, tilting or scratching are veterinary signs, not grooming problems, and they should send you to your vet rather than to the grooming box.
What tools do I actually need to start grooming a dog at home?
A workable first kit is smaller than the internet suggests: a clipper with a set of snap-on guard combs, a slicker brush, a metal comb to check your own work, blunt-nosed safety scissors for face and feet, nail clippers or a grinder, styptic powder, a dog shampoo suited to the coat, a few old towels, and a non-slip mat for whatever surface you use. That is the illustrative 180 dollar starter kit in this field guide. A forced-air dryer is the one genuine upgrade for thick or curly coats, because drying is where home grooms most often fall short, but it is a second-year purchase rather than a first-day one. Skip anything that promises a professional finish out of the box, and skip blades you have no plan to use.
When should I stop and book a professional groomer instead?
Stop and book out when the job stops being cosmetic. Tight mats against the skin, a coat that has felted into a solid layer, any dog that snaps, panics or cannot be handled safely, a nail bed or skin patch that looks inflamed, a double-coated dog someone has told you to shave, or a first groom on a puppy you would rather have go well than go cheap are all reasons to hand it over. A professional groomer also has a table, a proper dryer, and a set of blades that let a mat come off safely rather than painfully. Paying for a session that protects the dog is a better use of money than a home groom that ends in a nick, a shaved patch or a dog that will not get on the table again.